Wednesday, December 11, 2013

Drakkar in Blue and White

Well, it was another success.  I made another soap for an order the other day and it came together nicely.  It did start thickening a bit at the end, so it did not come together as smoothly as the Pink Lavender was, but it still came out rather nicely and I am quite pleased with the results.  I think it looks like the clouds moving by across a blue sky.


I made another soap today and hope to get it posted in the next couple days.  This one is a green and white Swirl scented with Eternity.  It came together fairly well also, but more on that when I post the picture ;-)

Saturday, December 7, 2013

Success with Pink Lavender!

After a couple of disappointments, I have had another successful soap. I didn't bother posting my blue soap on a stick that turned out looking very similar to the green soap I posted last time, just with blue instead of green. It was a lumpy, icky mess, but it smells nice and is still usable as long as you don't have to look at it ;-)

Anyways, on to the success story... I wanted to work with a scent I was familiar with, so worked with lavender essential oil, and used titanium dioxide to get the white color that was requested and ruby red micah to get the pink color I was aiming at. I used bentonite clay mixed in the essential oil to help hold the scent of the oil in the soap, as essential oils tend to fade a little more than fragrance oils usually do.

My normal soap base came together well, and I was careful not to over mix, coming to a very light trace before adding the fragrance and mixing it a bit more. The bentonite clay made the soap a bit darker and I was worried I would have trouble getting a decent white with it, but I managed to get one of my best whites yet by adding more titanium dioxide than I normally add and mixing well. I managed to still keep a light trace even after mixing everything, which made me very happy, and it was still pretty light and poured evenly into the mold. I think this was a first for me. Most of the time, by the time I pour I have a thick trace and it is pretty hard to pour, so I was happy with this change.

I let it set overnight and in the morning it was still soft, so let it set most of the afternoon as well before I took it out of the mold and cut it. It was still a bit soft when I cut it, and I waited a bit longer then normal to take pictures because of that reason. I think the fact that I had such a light trace was the reason it was so soft. It is otherwise behaving well and has since hardened up fairly well. So, here is my lavender soap in pink in white, as requested by the customer!

Sunday, November 24, 2013

A Big Disappointment

So, I made another soap last week and I am just getting around to posting about it now. Mostly because I was disappointed with it. It started out really well too! I was being very patient and had high hopes for this to be one of my better soaps and well, it was not to be.

So, I mixed my ingredients and instead of waiting to add my fragrance oil until after I had mixed the soap some, I decided to try and add it to the oils and hopefully give myself a little more time with working with the mix so I had one less thing to stir in and hopefully cut down on my chance of stirring too much in the early stages. Well, this was a mistake, it would seem, because as soon as I poured in the lye mixture to the oils, I got soap about the thickness of bread dough.

To say I was not impressed would be an understatement. I work the soap as much as I could and mixed in the colors as best as I was able. The green I was mixing came out mostly okay, but the white left little to be desired. Also, it was crumbling as this point and I shoved it into the mold and hoped for the best.

The top bubbled and it leaked a little oil that it then soaked back in, but it has a sort of crumbly texture to it. It does pass the zap test, so does not appear to be lye heavy, just the reaction from the fragrance oil did weird things to it. To top it off, when I cut it, I could not get things lined up right and my bars are all uneven. This batch was supposed to be used as a gift, but it is not going anywhere.


I am very frustrated. As a note, while I was writing this, I worked on another batch of soap and added the fragrance oil later. The fragrance oil was a different oil from the same company, but it did the same thing. I will unmold that one tomorrow and see if it came out any better then this one, but it is not looking good right now.

Sunday, November 17, 2013

Back After a Long Hiatus

Yes, I am back making soap again!  It was a long, hot summer, followed by a move, that left me a bit discombobulated, but I am back and making soap again.  Over the summer, the old apartment was way too hot to contemplate making soap and the AC unit for the apartment was not worth turning on as it did little to nothing to alleviate the heat.  The new apartment actually has cross ventilation, so it should be cooler during the summer.

Anyways, I have an order for four soaps for Christmas, and also am trying to get Yule in order for friends for the season, so I am madly trying to make soaps.  I made one yesterday, which was my first soap in a long time, and all things considered, it came out fairly well.  I used a dupe of Axe Voodoo fragrance and made the white with yellow swirled.

As usual, it thickened faster than I would have liked and by the end, I was dealing with a pudding like consistency of soap, and I did not get quite the shade of yellow that I would have liked. Overall, I am pretty happy with it still, and I hope that the person receiving it will like it as well. 


Thursday, May 30, 2013

My Latest Projects

Well, I have been lousy at keeping up with pictures and my blog, but I have actually made a couple soaps in the past week or so.  The first one I made was a request for another Green Tea Lemongrass soap similar to the one I did early on.  It is made with a green tea infusion and dried green tea leaves in the soap along with lemongrass essential oil as a scent.

I was prepared for the fact that the soap would not be pretty as it was setting up this time, so was not terrified by the ugly brown color this time.  I did run into a bit of a problem, however.  I did not do very good with the liner and it folded back into the soap, so it ended up with a nasty chunk out of the top on one side.  Hopefully, the friend that I made the soap for does not mind if some of the soap is not the prettiest.


This is a picture of one of the soaps that had the liner fold back unto the soap.  As I said, not very pretty.


The other soap that I made just a couple days ago was using Northern Pines fragrance (which the friend that I bought it for says, "It smells kind of like Lysol, but I like that.").  I made him some melt and pour soaps with the fragrance before, but wanted to make him some handmade soaps as well, so I did an in the pot swirl.  It came together very easily and I think it came out fairly well except for a little ash on the top.


Hopefully, I will have more soaps forthcoming and it won't be too long between posts!

Monday, May 20, 2013

Bramble Berry Soap Swap Haul!

Well, after several days of not writing, I have two posts in one day.  My package from the Bramble Berry Soap Swap arrived today!  I sent in twelve soaps and received thirteen in return.  It appears that I got my soap in early enough to get one of the bonus soaps made by Anne Marie from her book.  I am happy with my little haul and there is a nice variety of soaps for me to try.

I am particularly fond of the scent of the Arabian Spice scent.  There are also some really nice essential oil blends as well.  The one made by "Dana" has a link on the back to the video showing how it was made.  I haven't watched it yet as I was busy picking up the car and getting groceries today, but I plan on watching it tomorrow most likely.

My only mild disappointment with the swap was that I got two soaps with the same scent and it is not a scent I am particularly fond of (Cherry Blossom).  Overall, I am very happy with the haul and I had fun opening all my little soapy gifts!  I hope that the people who got the soaps that I made are not disappointed with them.  I feel like such an amateur compared to some of the other soaps that I received.  It was nice to see the other wrapping ideas that people had as well.  Overall, I had a great time and learned from things, I think.


Long Time No Soap...

It has been a while since I have posted and my life has been a bit crazy.  I have made one soap since I last posted and I plan to make some soap today if things work out as planned and the garage does not call and say the car is done before I am done with making this post.  The car needed an oil change and to have the AC looked at.  Hopefully, the AC is not going to be expensive as I am low on funds (as usual).

Anyways, my latest soap creation was actually made last Tuesday (I think), and I am only now getting around to posting about it now.  This soap was made with my usual recipe and I used red oxide to make an in the pot swirl.  I made the soap at a lower temperature as I have been doing lately, and it came together a little slowly at first, but when I started working with the color it started thickening up fairly quickly.

I managed to get it to behave long enough to get it poured into the mold and allowed the soap to gel as it did not have any milk products in it or anything that would cause it to overheat.  The soap set up well and I cut it the next day as usual.  Instead of taking pictures right off as I often do, I waited a bit as I had been pretty busy.  When I did take the picture the creamy color of the soap had darkened, so I found out that the fragrance oil that I had used (Ginger Spice) had vanilla in it.

Overall, I am not upset with the way the soap turned out.  I love the scent of ginger and while the soap is a bit darker then I had "planned" I am not upset with it as I knew very little about the fragrance oil I was using (I bought this fragrance oil through Etsy).  I hope that the other scents that I picked up with this one work out well.


I will do my best to keep up better with posts here and get back in the swing of making more soaps again. I have not been feeling very inspired by much lately, which is likely part of the toll of depression. The only thing I can do is to fight against it by making more soap and working on staying active.

Saturday, May 11, 2013

Chocolate Milk

Knowing that it was going to be a busy weekend, I made a soap sort of late on Thursday evening.  I did another goat's milk soap, but this time I used chocolate fragrance oil and colored it with cocoa powder.  I do not usually like foodie soaps for myself much, but I really wanted to try the cocoa soap for some reason.  Maybe it is because I love chocolate so much.

Anyways, I had the goat's milk measured and frozen beforehand as I had with the oatmeal, milk and honey, but this time I measured the oils out and let them come to a reasonable temperature (about 85°)  before I even took the milk out of the freezer.  Again, the mix came to trace nice and slow so it I chose to do something more complicated, I would have had plenty of time to work with it.  As it was, I did a plain chocolate color bar instead of doing a swirl.  I added about 3 teaspoons of cocoa powder to the mix at trace and it was still a bit light when I poured it into the mold.

Like the oatmeal, milk and honey soap, I put it in the freezer to avoid scorching.  I left it in the freezer for two hours then moved it to the fridge for the night.  This is where things differ from the oatmeal soap.  I slept poorly on Thursday evening and got up early Friday morning (kind of like I did last night, which is why I am posting so early in the morning), and took the soap from the refrigerator to see if I could unmold it.  I had been a bit impatient... and the soap was not quite ready.  I let it sit on the counter instead of trying to cut it immediately, and it went through gel phase.  I don't mind that it did, because it darkened the soap and didn't harm anything.

After it finished gelling, I was impatient to cut it and it was still too soft.  I managed to cut two pieces and then realized it was not working well, so let it sit longer.  I waited several more hours to cut it and then let it sit longer until I neatened it up and took pictures.  This was part of why I did not have this post yesterday instead of today.   So, this is the soap I dubbed "Chocolate Milk."


In other news, the soaps for the soap swap have begun to arrive and I got a few packages in the mail yesterday. I love seeing other people's creativity and how they have wrapped their soaps and such. I am looking forward to getting more of the packages in and getting pictures of the swap soaps! I also get a bunch more soaps to try out and see how I like!

Thursday, May 9, 2013

Oatmeal, Milk and Honey

I mentioned a bit ago that I had someone that was offering me some goat's milk.  Well, I got my goat's milks on Sunday and Tuesday after freezing some of the goat's milk, I made my first milk soap.  I made oatmeal, goat's milk and honey, unscented.  For the most part, I kept to my usual recipe of olive, palm, coconut and castor oils, but I used the goat's milk to replace the water in my lye mixture.  I used 100% goat's milk and no water in the mix. 

As I had done a fair amount of reading in advance on how people have been doing goat's milk soaps, I had a pretty good idea of what I wanted to do.  I measured out and froze the goat's milk in an ice cube tray the day before so it would not get too hot when I added the lye.  I mixed the oils before I started mixing the lye, and next time I do this, I will wait until the oils cool some before I start adding the lye to the milk.  If the goat's milk (or any milk) gets too hot as you add the lye it will overheat and scorch, turning brown and sort of curdled.  While it is still usable if you do that, it does not smell very pleasant and does not have the nice creamy appearance of a bar that has not been scorched. 

Well, with me, I mixed the lye to the milk cubes and the lye mixture started to rise in temperature as I waited for the oils to cool off.  I ended up putting the lye mix in the freezer to avoid scorching as I did not want to add it to the oils while they were too warm.  The lye mix was very thick as I poured it into the oils (I had already added a teaspoon of honey to my oils so I wouldn't forget).  The mixture came to trace fairly slowly compared to what I am used to, but it seems to have done well.  I added the oatmeal at trace.

I put the soap in the freezer for about three hours after I poured it, and then switched it to the refrigerator.  This was to keep the soap from overheating and also kept it from gelling.  It was my first soap that did not gel.  Overall, I am happy with the way it turned out. 


I am not sure if I will get much in with soaping this weekend, as I have some other plans that will keep me pretty busy on at least Saturday. I am hoping I will get at least one batch in, maybe more, but we will see! Until next time, soap happy :-)

Tuesday, May 7, 2013

Still Making Soap

Yes, I am still making soap and still here.  Things have been a bit stressed for me lately and I have been struggling with depression some, but I am still here.  I made a couple soaps over the past week, but one of them I didn't post because it is my second swap soap.  I think overall it came out well.  The second soap that I am posting a picture of today is a plain unscented soap.  I had expected it to color morph because the scent has some vanilla in it, but so far there has been no real noticeable change.

This is the first soap since I started making soaps that I did not add any color to, and I specifically didn't add it because I was not sure how dark it would get.  I was a little lighter on the fragrance then I usually would be (I used a bit less then an ounce for 1.25 lbs), because I did not have enough of the fragrance left.  I can still smell the fragrance now, but it is obviously lighter then my other soaps.  This is a good test for me as my brother has specifically asked for lightly scented soaps.  I would like to see how the scent in this holds up over time.

The soap came out fairly nice and  while it looks fairly plain, I love the scent.  When I make the scent again, I will know that I can play more with colors with it and will come up with something a bit more colorful or fitting for the fragrance.  Oh, the fragrance is Bay Rum from Bramble Berry, and I really hope that I can place another order from Bramble Berry in the semi-near future and pick up some of their scents that I really like.


I also have handed out soaps to friends as testers and have gotten some reviews back.  So far, the reviews have been almost all positive.  One person has said that my soap was a little drying to her, but that her skin leans towards dry and to not be too concerned about it.  The other feedback I have gotten has been good and at least one person has said that he would buy my soap.  Another is looking forward to me opening my Etsy shop.  At this point, I am still planning on opening in November.  I will manage to get things together for setting up one way or another.


Wednesday, May 1, 2013

Another Request

I had another request yesterday for a lilac soap with purple and white tiger stripes.  Before I say much more about how the soap went, let me say some things about the significance of this soap and making it yesterday.  My mother died 17 years ago yesterday and lilac was her favorite scent.  My sister suggested the tiger stripes and was the one that gave me this request.  So, this soap is dedicated to my mother.  It is also a gift to my sister as well as her birthday happens to be today (although it is going to take some time for the soap to cure, I hope she will appreciate the sentiment).  The tiger stripe colors were to be done in purple and white for the two colors of lilacs.

All that said, the soap did not come together as nicely as some of my previous soaps and I had some crackle with the titanium dioxide, so my white is not as nice and smooth as it could be.  I soaped at the lower temperature as I had been doing the past few times, but I still came to trace faster then I expected and by the time I started pouring the two colors... well, it wasn't so much pouring the colors as I was scooping them into the mold.

I think it smells wonderful and for all the difficulty I had with getting it together, I actually am pretty pleased with the way it turned out.  The stripes are not as symmetrical or even as some of my other attempts at this swirl, and I think it looks more like a zebra stripe this time around.  I hope that I can get some more lilac fragrance oil in the future and try this again, but for now this is how this one turned out.

Today I worked on my second swap soap, but what I did for it is a secret. Hopefully, it turned out well. Like my first soap for the swap, I will take pictures and save them until after the swap.

Tuesday, April 30, 2013

An Experiment by Request

Well, I put out there is anyone wanted me to try any techniques or anything, and I got a reply on Facebook that someone wanted me to try changing my recipe some and do an experiment with a few different things.  The challenge was to make a soap that was primarily olive oil with 20% or less of palm and coconut oil.  She also wanted me to add some salt and sugar to the recipe to see how it changed things.  It will likely be hard for me to gauge all the changes because they all happened at once, so I can't say for certain which did what.

Anyways, the recipe I chose to use was 60% olive oil, 20% coconut oil, 15% palm oil, and 5% Shea butter.  I also added a teaspoon each of sea salt and sugar (as usual, I was making a fairly small batch 1.25 pounds of oils, so I used a little less then a teaspoon of salt and sugar per pound of oils in the recipe).  Things went together smoothly and I mixed the lye with the oils at about 110° F.  Things reached trace fairly slowly even using a flowery fragrance, and remained relatively thin while I separated my batter for coloring.

I chose to do an in the pot swirl as I was not sure how things would come together with the new recipe.  I would have had plenty of time if I wanted to do something more complex though.  I used green oxide and titanium dioxide for the colorants.  I was able to unmold the soap after 14 hours, but it was still very soft.  I usually cut right after I unmold and had to wait another three hours before I could cut it and it was still pretty soft then.  I believe this will need a slightly longer curing time then I usually have, but it is not like I am lacking in soap to use right now.

The results of the experiment were a soft and very smooth feeling soap.  I am not sure about the lather of it at this point or how long it will take to cure.  It feels damp to me at this point.  I am otherwise happy with the experiment and time will tell on the rest.


In other news, I dropped off a batch of soap with some testers last night. I think overall they went fairly well, but I am not as sure what this group of people like for scents. I also plan to bring the soaps to my gaming group this weekend and seeing if some of my friends there are interested in some as well. I was also offered some goat's milk to make soap with as well, so I will have some more new testing to do in the near future. I hope to hear back from my friends about the soaps they have tried and have some more feedback on ways to modify my recipe(s) to make soap that works well and is still moisturizing and such. I am not sure I am the greatest to tell if a soap is too drying as a lot of times my skin tends to be a bit more oily, so getting others impressions will be good for me!

Sunday, April 28, 2013

Mountain Lake Soapy Goodness

Well, after taking a night off from making soap, I came back and had another success.  I ran out of castor oil again, so I made another soap with just olive, coconut and palm oils.  I also think I know part of what my problem is with my soap coming to trace so fast and moving so fast, in general.  I believe that I have been mixing my oil and lye a bit warmer than I should and that it has been causing the acceleration.  Last night I specifically mixed cooler and had more time to work on my tiger stripe pattern without rushing through it.

With one issue down, I also wisely had lined my mold the day before so it would be ready for last night.  I was really ready for a change!  I mixed my oils and had my colorants ready, then came and looked through some posts on the Soap Making Forum while I was letting things cool off.  I think my only real complaint about how things came together in the actual soap making process was that I was very messy in pouring my soap and got it everywhere.  I managed to get most things cleaned up, but my shiny new mold had not been looking shiny and new anymore!

Anyways, for my soap, I used Mountain Lake fragrance oil from Peak Candle Supply.  For colorants, I used titanium dioxide and cobalt ultramarine.  I did the tiger or zebra stripe pattern again, and I think it was my best attempt at it, even as messy as things were.  I will let you decide though!


I believe the next soap I will have time for will be on Tuesday and it will likely be one of the soaps I send for the swap.  I am likely not going to post pictures of it, but I may find some other things to post pictures of or post about in the meantime.  I know I don't have a huge following or anything, but I was wondering it there are any soaps that anyone who reads this would like me to try or has suggestions for.  I am somewhat limited by finances on some things, but I have most color choices at this point.  As for fragrances, I have some and will see what i can do if there are any special requests!

Friday, April 26, 2013

Excitement to Disappointment

 Well, I had an interesting soaping experience last night.  I had a soap that did not speed up on me and was actually slow coming to trace.  It was kind of weird having time to work with it.  I was really in a groove and added the fragrance oil to the portion of the batter I wanted it in and it did not accelerate on me.  I then added some black mica and it turned grey, so I added some activated charcoal as well.  I had plenty of time to do all that and things were going great.  I turned around to pour my soap in the mold to find out I had forgotten to line it.

I was able to remedy that situation quick enough, and got the mold lined.  My soap was thickening as I poured it, but it was no worse then some of my others had been.  I figured I would practice another mica swirl on the top and I was very happy with the way it worked.  All things considered, everything came together really well and I was really looking forward to checking out my soap this morning.

The disappointment came when it was time to take it out of the mold and it was still a little warm and soft.  I could not resist taking a peak to see how it looked and was disappointed to see that the black I had worked so hard to get had morphed into a drab olive green on the outside.  This was not a feature to me.  The inside of the soap seems to be a light gray at this point while the outside has remained olive green.  Time will tell if it will stay that way.


Overall, I would say that it was still a successful soaping experience. I would like to know why this soap behaved so differently then my other soaps have. I used my usual recipe and soaped at the same temperature I usually do. I guess I may figure it out eventually, but for now it is a mystery to me.  I may or may not be making another soap tonight.  If not, I will definitely make one tomorrow.

Thursday, April 25, 2013

My Ugly Soap

Well, my first soap ever was a disaster (well, it was lye heavy and makes a nice laundry soap, so not a total failure), but since then I have been mostly happy with most of the soaps I have done.  That is until the one I did last night.  It isn't terrible, but it is not what I wanted either.  I was trying to get something that had a sort of camo appearance to it, but with different colors then camouflage usually has.  I wanted a red, brown and green.  The problems I had were that my soap thickened up too much too fast yet again and that the red and brown were too close together in shade, but I wasn't sure how to change it much with the thickness of the batter already.

So, I guess my soap isn't too bad, but to me it is fairly ugly as it is nothing like I envisioned it to be.  It is fairly blocky instead of being as random as I would have wanted it to be.  There is one thing I can say that I love about it though, and that is the scent.  I used Peak's Cinnamon and Balsam and I am in love with it.  I love spicy scents and the hints of a woodsy fragrance in the background just make it more appealing to me.  So, anyways, here is my ugly soap!


In other soaping news, I made my soap for the swap and I am happy with the way it turned out, but I am not going to post pictures until after the swap.  I hope that it holds up well through curing and shipping and all.  I have plans for a second item that I will be making for the swap as well, but I need to wait until some supplies arrive from Wholesale Supplies Plus.  I have one order that I placed with them that should be shipping soon, and another one that is due today.  I need to wait for the one that has yet to ship sadly.

Today's shipment should hold a couple new fragrances, some more titanium dioxide, yellow oxide and ultramarine blue.  I have a plan already for making a soap with the blue today or tonight.  The way it is looking it will be tonight, as I also have to visit my partner in the hospital today and my order just arrived now.  (I was just about to say it hadn't arrived yet and the UPS delivery guy showed up at the door)  I should be back tomorrow to show you something with blue.  It would be nice to have something with a new color!

Tuesday, April 23, 2013

Sorry!

Sorry I did not post a cut picture like I said I was going to yesterday.  The day was pretty busy for me and I just ran out of time with all the errands I had to run.  I also was not able to make my soap for the soap swap yesterday either.  I ran out of parchment paper so had to run to the store and pick up some freezer paper to line my mold with.  By the time I got back home, it was time for me to run out to the hospital and visit my partner.  I seemed to always not have enough time to post or make soap!

So, I think the mica swirl for the challenge came out very well, even if it was late to actually turn in for the challenge.  So you know, I used Nag Champa to scent the bottom portion of the soap and left the top part with the red mica swirl unscented.  The brown portion is colored with brown oxide.  So without further ado, the mica swirl!


One of the other things that I did yesterday while I was running around madly, was mail out some soaps to my friend Matt in Washington and mail out some stuff including soap to another friend.  I was up until about 4:00 am the night before designing and cutting out the labels.  I think I can make the labels faster now that I know what I am doing.  Cutting them out on the other hand and looking good when they are done may take more talent then I have.  I have mentioned not being able to cut a straight line before... well, my ability to cut a circle is worse!

Anyways, these are some of my round soaps all wrapped up pretty (or as pretty as I could get them), and ready to be shipped out.  They are due to arrive with my friends on Wednesday and I am hoping that they get favorable reviews.


Sunday, April 21, 2013

Lots of Soap Pictures!

As promised, I have a picture of the soap that I cut yesterday but did not have a picture of.  This was the Juniper Breeze soap with an in the pot swirl done in green oxide.  This was the soap that I poured Friday night and managed to make such a mess with.  All things considered, I think it looks fairly nice if I do say so myself.


This second soap is one I did late last night after visiting my partner in the hospital.  I attempted to do another tiger swirl and it was not quite as successful as my first one (at least to me).  As with many of my soaping attempts, it thickened up faster then I would have liked and by the time I got to the top I was sort of slopping it into the mold.  I also noticed that the black in this started to show natural color around the edges and seemed to have some crackle effect to it.  I am not sure if it overheated or what happened.   I might have to post on the forum and ask about it.  I seem to be getting that more since I have been putting the mold inside the box to preserve the tops of the soap.   It may be an effect of that or something else entirely.  This is scented with Blackberry Sage and colored with green oxide and black mica.


This third picture I debated not posting as this soap is sort of a trial for my soap for the swap I am hosting.  I would kind of like to keep what I am doing a surprise, but I know myself well enough to know that I won't be very good at it!  This soap is also my (late again) challenge from the Great Cakes Soapworks week three challenge.  The challenge was to do a mica swirl on the top of a soap, so this is my first attempt at a mica swirl.  The soap is still in the mold and wet, and will likely look rather different after it has gelled, but I wanted to give you a preview picture.


Saturday, April 20, 2013

Two Soap Night

So, last night I had to take my partner to the  hospital for problems with depression.   This left me feeling pretty stressed out myself,  so I dealt with that stress by making soap of course.  I had run out of castor oil, so had to modify my normal recipe.  I had decided I wanted a purple color, so I used alkanet root powder.  I had not finished my infusion,  so I added half a teaspoon at trace.  

I was pleasantly surprised by how smoothly everything worked out.  I used the fragrance oil Country Garden from Peaks Candle Supply.  The powder mixed in easily enough despite me spilling a fair amount on my stick blender.   The resulting soap turned a nice dark purple,  but that shade may change as the soap cures. 

The second soap I made last night was scented with Juniper Breeze.  I used green oxide and did an in the pot swirl.  This soap I poured into my PVC mold as my log mold was already being used.  I had done some rearranging in the kitchen and the place I normally used for keeping my mold steady had been removed.  I found a place to put the mold after it was filled, but did not know how to brace it to pour.
I then got the (not so) brilliant idea to hold it against the sink and brace it with my stomach.  I soon realized that holding the mold upright, pouring soap, and holding the bowl of soap batter is easier said than done.  I managed to get most of the soap into the mold without making too much of a mess.  I will likely post pictures of that one tomorrow.  I have taken it out of its mold, but still need to take pictures of it.

In other news, I got an order of essential oils in this afternoon.  It was only two essential oils (lavender and lemongrass), but they were both eight ounce bottles.  I also was able to put in an order with Wholesale Supplies Plus last night thanks to my friend Matt (aka Jethal from EverQuest 2).  So a big thank you to Matt!  I would also like to thank Elizabeth from the Soap Making Forum for all the help she has given me with the soap swap that I am hosting.  She has been great at keeping me on track and remembering the little things that I might otherwise forget.  


Thursday, April 18, 2013

Busy Few Days

So, it has been a few days since I have written.  I meant to write yesterday, but I ended up being pretty busy and things were kind of insane for me.  I don't always multitask well, so I ended up not getting some things I wanted to done.  I made a soap Tuesday, and cut it yesterday morning.  I wanted to take pictures and post them, but it was not to be.  I did manage to get the pictures today and will post one here with this.

As for what has me so busy, I have started to organize an unofficial soap swap with a bunch of people from the Soap Making Forum.  As I have not been a member long enough, I can't be in a swap, much less host one.  It was suggested that I could host one through facebook unofficially, so I started getting things together and have been busy organizing people.  I really have to thank the others on the list that are helping me with organizing.  I am so happy with the group of people that we have involved in the swap.  I am really looking forward to see the creations that everyone comes up with! 

Okay, I will try to stop bouncing around about the soap swap for a little bit at least and talk about the soap I made on Tuesday.  I made an in the pot swirl using three colors to try and make the look of a cloudy night.  Not sure I succeeded, but that was the plan.  I used the scent Midsummer Night, which is likely my favorite Yankee Candle scent.  I was doing good with the soap until I added the fragrance oil (at partial emulsification, I forgot to add it before I started mixing again), once the fragrance oil began to mix in it immediately started to accelerate.

Even with the fast trace, I was still able to get the soap together without too much difficulty.  It was pretty thick when I poured it into the mold and was hard to get a nice look on the top, but it turned out fairly well.  I also tried a new method of insulating it and put the mold inside a refrigerator soda pack box and then insulating the box so I didn't damage the top of the soap with plastic wrap.  The things I noticed with this is that the top cracked a little bit and the white at the top turned sort of pinkish.  I am not sure if that was a sign of overheating or if it was some discoloration from the fragrance oil.


Monday, April 15, 2013

Another Adventure

After a few days without soaping and feeling the desire to make soap grow on me, I finally broke down yesterday afternoon and made some soap using my rubber gloves that are a bit to small for me.  Things actually were going really well for me and I thought I was going to make it through my soaping for the day without an adventure in the process, but it didn't quite happen that way.

Before I start this, let me tell you a couple things.  I spend Sunday through Wednesday evenings in an online game which involves getting together with another 23 like-minded people and fighting big nasty monsters on a computer screen.  This keeps me entertained and distracted those evenings.  Days when I don't do that and don't have other things to do,  I consider my busy soaping days.  When I ran out of gloves on Thursday, this left me the rest of the weekend with no soap to make.  Let's just say that I was feeling a little grumpy about going those days without being able to make any soap.

So, I finally decide that I am going to make my soap and I have plans that evening, so I can't take too long in making it.  I was not planning on anything too complicated, so this seemed like it was a great plan.  My partner was in bed, so I took my iPod and even was able to listen to some music as I made my soap.  Now, I have my nice new mold that needs to be lined before I can pour the soap into it, but I usually have plenty of time between when I pour my lye and when I actually start mixing the soap.  I basically said to myself that I could line the mold after I had the lye and oils measured, but before I mixed it.  There was time in between to wait as the lye had to cool.

Well, as you may have guessed, I measured everything out, then got my fragrance oil ready, and made sure my colorant was ready.  Now at this time, I started asking myself what it was that I had forgotten, but I rechecked to make sure I had measured out all the oils and lye and water correctly and had my color and fragrance ready for mixing.  I even did dishes while I was waiting for things to cool, because I had plenty of time.  Then I began mixing my soap, and it was not until I had the green color that I wanted and was saying to myself that it was nice to actually get to this point and not have my soap be too thick when it dawned on me that the mold was still not lined.

So, I grabbed my parchment paper and tried to rapidly get it to line the mold the way I like.  Well, it is a new mold, and my gloves didn't fit right and quick was not happening.  I ended up ripping off the gloves and folding the paper without the gloves on and then quickly moving back to my now thick soap.  I stirred it all up again, and then did my pouring and in the pot swirl and then poured it into the mold.  

Anyways, the soap is none the worse for the wear and I am actually pretty happy with the result.  Oh, this is scented with Lemongrass and Sage fragrance oil from Peaks.  I used Woodland Green Oxide from Wholesale Supplies Plus for the color.


Saturday, April 13, 2013

You May be Addicted to Soap Making...

I made my last soap on Thursday and I have not been very busy the past couple days and I have gotten a little twitchy.  I really want to make a soap!  If you are wondering why I am not making soap and instead just whining about not making any, it is because I ran out of latex gloves.  I always use gloves when I soap because of the caustic natural of soap and I am attempting to be safe with it.  I ordered new gloves and they are due in on Monday.  That means another day without making a soap.

On the plus side of things, the organza bags that I ordered to wrap my soap for the Bramble Berry Soap Swap came in today.  This meant I got to clean up my Cranberry Fig soap a bit and put it in the bags so it would be ready to send out to the swap on Monday.  I cannot put the name that I would like to use as a business name on the tags that I made up for the soap, but I did put a badger on them.  I made up the tags on a free program and cut them out by hand (yes, that means they aren't cut straight).

I am a bit nervous about the swap and hope that my soap is good enough for it.  I know I shouldn't worry about it, but it is that perfectionist nature that I have.  I wish it was better then it was, but it is what it is.  I have the date that it finishes curing on the bars, and they are wrapped and I think they do not look terrible anyways.  They even look semi-professional in my opinion.  I will let you decide.


In other news, I received some other things in the mail yesterday. I got some tussah silk to try in my soaps as well as some herbs for adding as natural colorants. I have some of the herbs infusing now (alkanet root powder, spirulina powder, and madder root powder). They should be done in a few weeks.  The infusions take a minimum of two weeks and I am really looking forward to working with them.  I also have a little powder left over and might see about adding some of the powdered herbs at trace to see how they work out.  I especially want to work some with the alkanet, as I have some fragrance oils that I would like to be purple.  I will have to see what happens on Monday between doctor appointments, dropping off my package and some other errands.  Hopefully, I will have time to make a soap although I am not sure what I will make yet.

Friday, April 12, 2013

A Personal Challenge

There was a challenge posted on Great Cakes Soapworks blog to make an elemental swirl soap.  This consisted of doing two three color in the pot swirls with different shades and a pencil line in between the two swirled areas.  Many of the soaps were done with elemental themes, such as fire and water or earth and sky.  I have to say that the soaps that were posted on the Soap Making Forum were amazing.  I wanted to try my hand at this, but I was having a hard time of figuring out which elements to chose.

In looking through photos on the forum yesterday, it suddenly hit me.  The element that struck me was to do the element of spirit.  I then had to figure out which element to do with it, or what would go with the theme, and inspiration was with me still as I realized I could do a soap based on Heart and Soul.  The challenge suggested that beginners do one color for each swirl plus the base color, but well, for me it was important that each swirl had three colors because of spiritual significance.  I believe that spirituality is a balance between body, mind and spirit and that all must be fed for spiritual health.  That is one of the threes, the other is that I am connected to a triple aspect goddess.

With this in mind, I planned my soap in its two sections.  The heart would be done in two shades of red plus the soaps base color.  I have a red mica and red oxide, so that worked for the two reds.  (They sort of blended together and can't really be distinguished in the soap at this point, that may or may not change as it cures)  I wanted the reds and base color to represent the heart both figuratively and literally.  As white and red blood cells moving through blood in the body in a literal sense, and as an emotional sense of vitality.  The soul or spirit section of the soap was done in black, grey and white as I wanted an ethereal feel of actual spirits.  For a fragrance, I chose the scent Eternity as it seemed fitting.  The pencil line was done in cinnamon mostly because it was what I had available.

As far as the process of the soap actually coming together, I did what I said I wasn't going to do and over blended it again before I started pouring and ended up with it being very thick again.  This was not then end of the world, but it did make it a bit more difficult to work with.  I also learned the valuable lesson of always mixing your colors after you pour them into their separate cups rather then waiting until right before you are going to use them, especially if your mixture is getting too thick already.  Let's just say that I had to stick blend the reds within an inch of their lives to get the colors blended.

I think for my first time doing something this complex, that it came out rather well.  I am also happy with my first pencil line.  I will try to once again remember my lesson on over blending and may even see about changing my recipe a bit to see about getting something that doesn't set up as quickly as was suggested to me.  So, this is the latest creation:


Thursday, April 11, 2013

The Wonders of Vanilla

This morning I got up and did my normal check-ins on the Soap Making Forum (did I mention that I am addicted to this whole soap making thing?), and there was a review of some fragrance oils which got me to thinking that I should do a review of Peak Candle Supply's Birds of Paradise fragrance oil since there had not been any note of one on the spread sheet that the forum had for Peak's fragrances.  The scent had been rather flowery and sweet coming out of the bottle.  Not my usual fragrances, but I had bought the fragrance for my partner.

I had not noticed that the fragrance had caused ricing or acceleration in making the soap, but I had noticed that the fragrance seemed less noticeable after mixing it.  I wanted to check and see how my soap smelled after it had settled a bit and see how the scent seemed to me now so I went over to the bookshelf that serves as a curing rack (it shares the space with the books, of which there are many) and looked for my nice creamy colored soap.  I looked where I thought I had put it and then looked around and could not find my nice creamy colored soap anywhere.

I then looked back to where I had thought I had put it to find the dark brown soap that had not been there the night before.  It was then it dawned on me that my fragrance oil had vanilla in it  and it had discolored my soap to this dark brown.  So much for the creamy whiteness that I had been envisioning for my first salt bar.

Anyways, I wanted to post a picture of how the soap had morphed overnight and show how the wonders of vanilla can change a nice, innocent, creamy looking bar of soap and change it forever in just one night!


Wednesday, April 10, 2013

Today's Project

Well, most things are still new to me with soap making, but rather then a new technique, I did a new recipe today.  Instead of making my regular soap, I made a salt bar of soap.  I had been reading a lot on salt bars and was curious about it and my partner said he was interested in having some salt bars, so it seemed like a good excuse.

My recipe is made with 90% coconut oil, 5% castor oil, and 5% Shea butter.  At a light trace, I added 75% the weight of the oils to the batter.  I had heard that adding the salt would greatly increase the speed of trace, but was a bit surprised when it didn't happen.  The salt did increase the general thickness of the batter, but not the consistency.  I hope that made some sense.  I had added my fragrance oil before I mixed my lye in again, so I had no worries about not being able to pour it into the mold on time.  In fact, it was worrying me a bit because it was still pretty liquid going into the mold. 

The other warning that I had read was that it needed to be taken out of the mold and cut after a couple of hours instead of being left for 24 hours like a more normal soap.  I started checking it after about an hour, and then I unmolded it after an hour and a half.  I was worried that it might give me trouble as I used a PVC mold and I feared it would get stuck, but it came out easy enough once I got it started.  Cutting this soap was a bit more adventurous then I would have liked because it was very crumbly, but this was not really a surprise.

So, in the end, because it was fairly crumbly, it does not have the nice clean cut that I would like to see in a soap, but I think I will be able to clean it up a little bit after it cures.  My other option is to not worry about the fact that it is not the neatest after being cut and next time see if I can use individual loaf molds like many people on the forum do.

The soap is scented with Birds of Paradise Fragrance Oil from Peak Candle Supply.  I did not add any colorant to this first batch as I had been worried about it accelerating with the salt.  I hope you enjoy it!  Sorry about the poor picture quality.  I will learn to take pictures one of these years!


Sun and Sand

I did not manage to post last night, but I did get to cut my soap and get a decent picture of it as well.  One of the things I noticed is that using the wooden mold instead of the PVC pipe that my soap was ready sooner and I was able to take it out of the mold and cut at 16 hours instead of 24 or more.  I am enjoying the new mold and cutter that I bought from Etsy and I am happy that I bought it.

The fragrance I used for this soap was Sun and Sand from Essential Depot.  The scent is a bit lemony with hints of what to me smells like a little anise and a sort of sweet scent.  I was not the most fond of the scent in the bottle, but I like it in the soap a bit better and it does fit for the soap that I made.  Two weeks ago there was a challenge on Great Cakes Soapworks blog to make what is called a Tiger stripe or Zebra Stripe swirl.  This involves taking two colors of soap batter and pouring it down the center of the mold in alternating turns.

I did not have my log mold to do the challenge on time, but I really wanted to try my hand at this soap, so I decided I would take the challenge a bit late.  I used my titanium dioxide for a lighter layer and red mica for the other layer which turned out looking kind of orange.  This was perfect, as it was what I had wanted.  I am not sure if as it cures it will turn more red, but we shall see in time.  Anyways, here is the result of my personal challenge soap:


Tuesday, April 9, 2013

Any Excuse to Soap...

My partner had surgery yesterday and things all went well for that, but it left me feeling tired and a bit stressed last night.  So, I thought to myself what is the best cure for stress?  Ah, I need to make soap!  (Any excuse is a good excuse in my book).  I did not get a lot of sleep yesterday, but there I was at 10 something at night just starting my soap.  I had measured my water and was just starting on the lye when the dog (my partner's German Shepherd that was very distressed that her person was not there and had not let me walk her or get her off the couch all day) jumped down from the couch.  In fear of an imminent accident, I took off my gloves and took her out to do her business.  We were both happier after that.

So, after my little side trip (I was very happy that I had learned how to turn off the auto shut off on my scale because I would have had to figure out how to pour it back and remeasure it), I finished measuring my lye and I was on my way.  It was only about 10:30 pm, I think... not at all too late to be making soap after I had been up at 5:00 am.  I managed to measure my oils without mishap and put those in the microwave while I played around with the colorants and got the fragrance oil measured out.

I got everything ready and had my brand new mold set aside and lined (it was an adventure just to get the thing lined for the first time.  I looked at some directions on the Soap Making Forum, scratched my head a lot and finally managed to do something that at least worked).  After waiting for a little while for the oils and lye to reach the temperature I like to soap at (generally about 115° F), I poured my lye water into my oils and stick blended very lightly.  I remembered my promise to myself to not over mix and I wanted to try a new design in my pouring.

I got my mixture separated into two containers and mixed some titanium dioxide (white colorant) into one and some red mica into the other.  I mixed the red a little longer then the white as I wasn't happy with the color at first and added a bit more color and blended it again.  I then began pouring the soap batter into the mold and I am not sure if I had a minor disaster or not.  It started to look like the white began separating as I was trying to pour it.  I mixed it again with a spoon, said a silent prayer and kept pouring.  After I mixed it with the spoon, it seemed to behave fine, so I am not exactly sure what happened or it I should be more worried.

Anyways, so far the soap seems to be sitting up fine and I should be able to take it out of its mold in about seven hours or so.  I might be able to take it out a little sooner, but I am not sure yet.  I guess I will see as time goes on.  Anyways, I will post pictures once it is safely (or even not so safely out of the mold) and cut. 

Saturday, April 6, 2013

A Realization and a Legend

I made my soap for the Soap Making Forum's monthly soap challenge last night.  I am beginning to realize that when I add my fragrance oil after I have already gotten the oils to emulsify that by the time I get my soap batter separated and mixed with the colors that I want them to be that the batter is going to be too thick.  This means I am not getting the swirls to turn out quite as nice as I would like them to and that by the time I am pouring into the mold that it is extremely thick and hard to work with.

At this point, it makes things messy and a little difficult to work with, but if I wish to make some of the more complicated swirls I am going to have to work at thinner trace for the results I want.  This leads me to think that I want to add in my fragrances before I start mixing.  It also means that I will have to gain a little more confidence and determining when the oils and lye have emulsified enough that it is not going to cause separation issues.

Anyways, my little realization aside, I am fairly satisfied with my new soapy creation.  As I have stated before, this month's challenge was "Locale."  For my soap, I chose to use a legend that was born in the neighboring town of Leominster, MA.  The story is told of a man who traveled around the country spreading apples and the apple seed.  Many of you may have heard of the story of Johnny Appleseed as a child, but many may not know that the story was based on a real man named John Chapman who was born in Leominster, MA.

John Chapman actually did not spread seeds randomly around the countryside as many may think he did, but actually built fenced in nurseries for the apple trees where they would be safe from livestock.  He was an early conservationist and cared deeply about the environment and about animals.  (Thank you wikipedia for the information, I am heading to bed or I would cross reference for accuracy and such).

So, as my soap is about Johnny Appleseed, it is scented with Peak's Apple Jack and Peel.  It is colored with chromium oxide (green), titanium dioxide (lightened the base color a bit), and Queen Kathryn mica from TKB Trading.  The picture makes this look rather orange, but it is actually more of a pink that I am hoping will darken closer to red in time.

Friday, April 5, 2013

Cranberry Fig Scented Soap

Well, after my adventures with the cranberry fig scented soap for the Bramble Berry Soap swap yesterday, it was with some trepidation that i approached cutting my latest soap creation.  Not only was I unsure how my swirls would turn out, but I also have the added pressure of trying to make straight cuts for a soap that is going to be going out to people.  I might add to this that I can't draw a straight line with a ruler, so cutting straight with a butcher knife and no guide was not something that I had a lot of confidence in.

I did mark the soap off on both edges at that places where I needed to cut it to make the cuts a little neater, and, overall, it did not come out badly.  As I used a cardboard box that was eight inches across, I first had to cut the soap in half and I was actually pleased with how well that cut came out.  Then each half of the soap (eight inches long each) needed to be cut in one inch slabs.  As I said, it came out fairly well, and the soap should all come up to at least the 4 ounces that is required for the swap.

So, anyways, this is how the cut pictures of my newest soap turned out.


I will likely be working on my challenge soap a bit later this evening.  That is the one for the Soap Making Forum's monthly challenge.  The theme is "Locale," and I have my plans worked out for what I would like to do for the soap.  Now, it is just a matter of execution.  I should have some cut picks of the challenge soap tomorrow or Sunday (tomorrow may be a bit busy as I have some plans to go help a friend do some Spring barn cleaning).

Thursday, April 4, 2013

Today's Soaping News

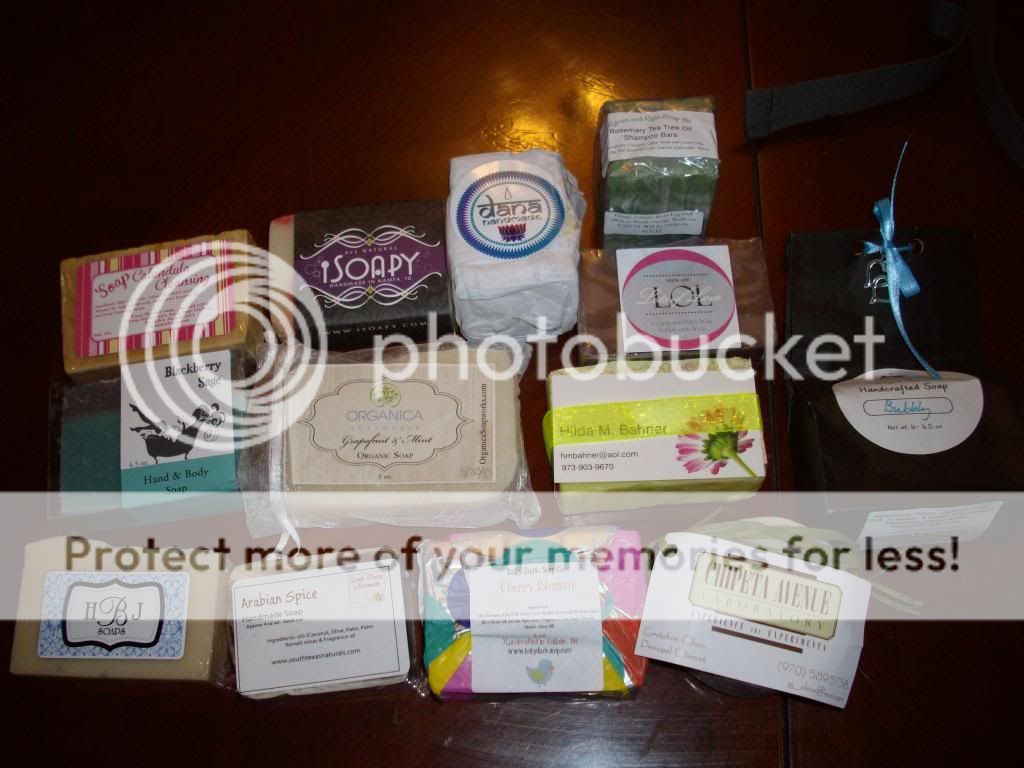
Well, there were a few things that came up today with soaping news for me.  The first of which is that my order of fragrance oils from Peak arrived today.  I received the 20 one ounce containers that I ordered plus an ounce sampler of Country Garden scent for free.  Here is a picture of my little haul.


The scents included are Blackberry Sage, Applejack and Peel, Cinnamon and Balsam, Juniper Breeze, Jasmine, Lavender, Lilac, Midsummer Night, Red Clove, Sage and Lemongrass, White Tea and Ginger, Asian Sandalwood, Mountain Lake, Nag Champa, Frasier Fir, Black Canyon, Birds of Paradise, and Stargazer Lily (I got two each of Midsummer Night and Sage and Lemongrass).  Of the scents that I got, I really like the Midsummer Night, Juniper Breeze, Lilac, Red Clove, and Sage and Lemongrass.  Some of the others a bit sweeter then I would normally like scents, but most of the scents are not one's that I would actively dislike having in the apartment (I do not like using the flowery scents myself, but have picked them up for friends and/or family).

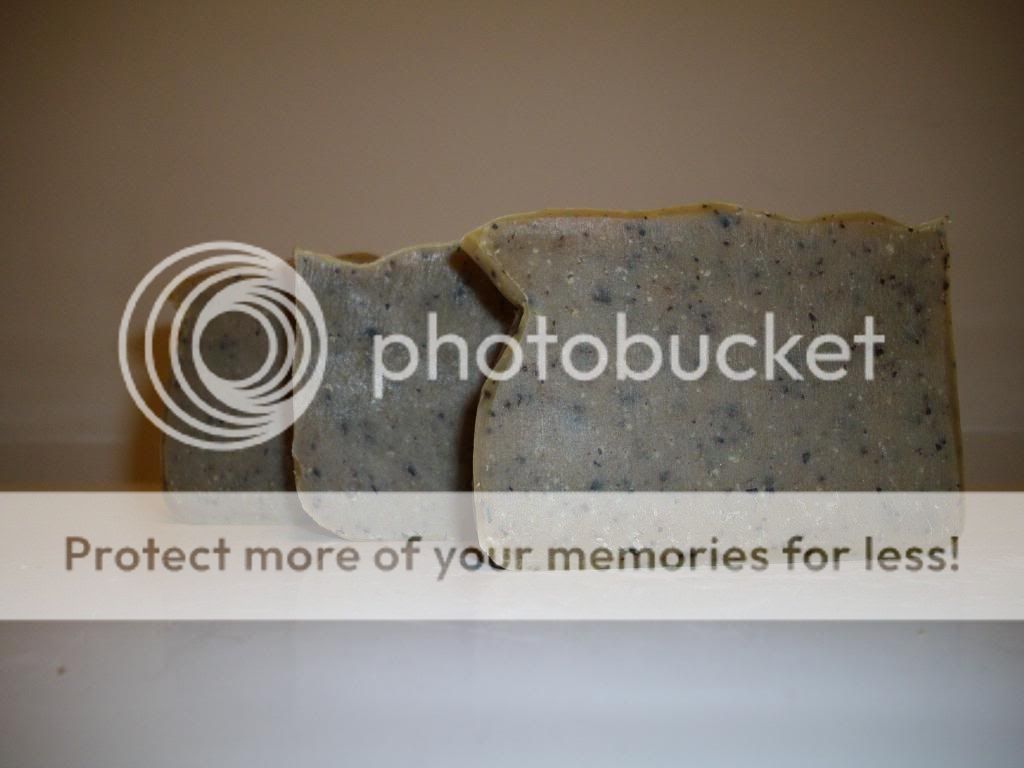
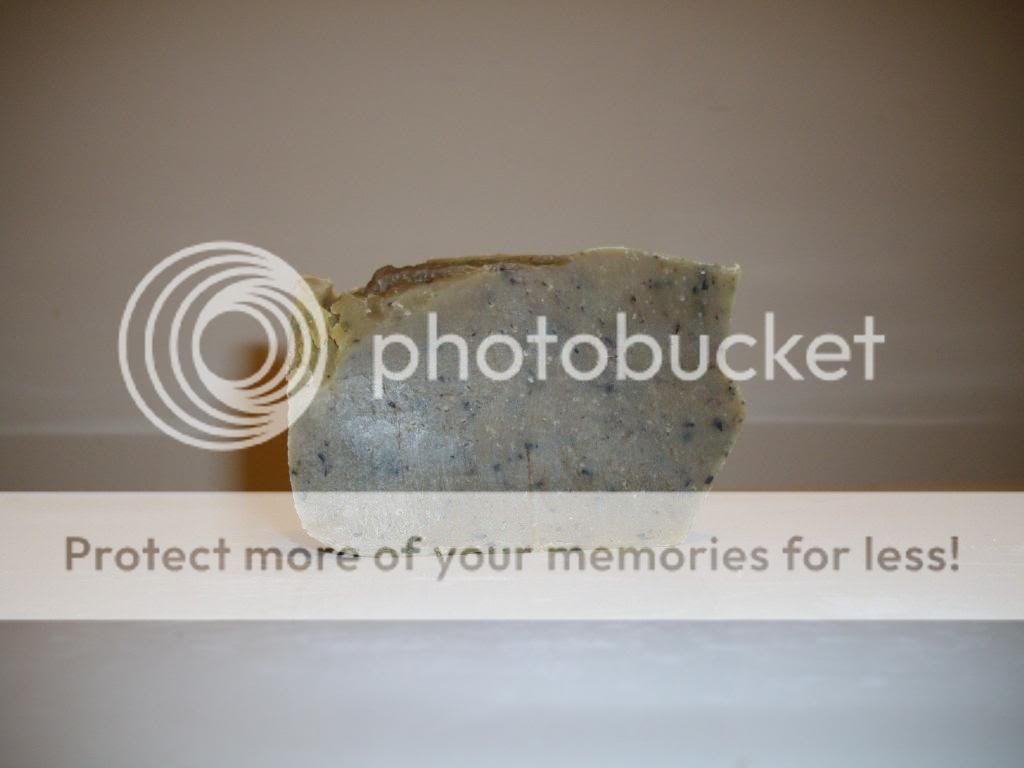
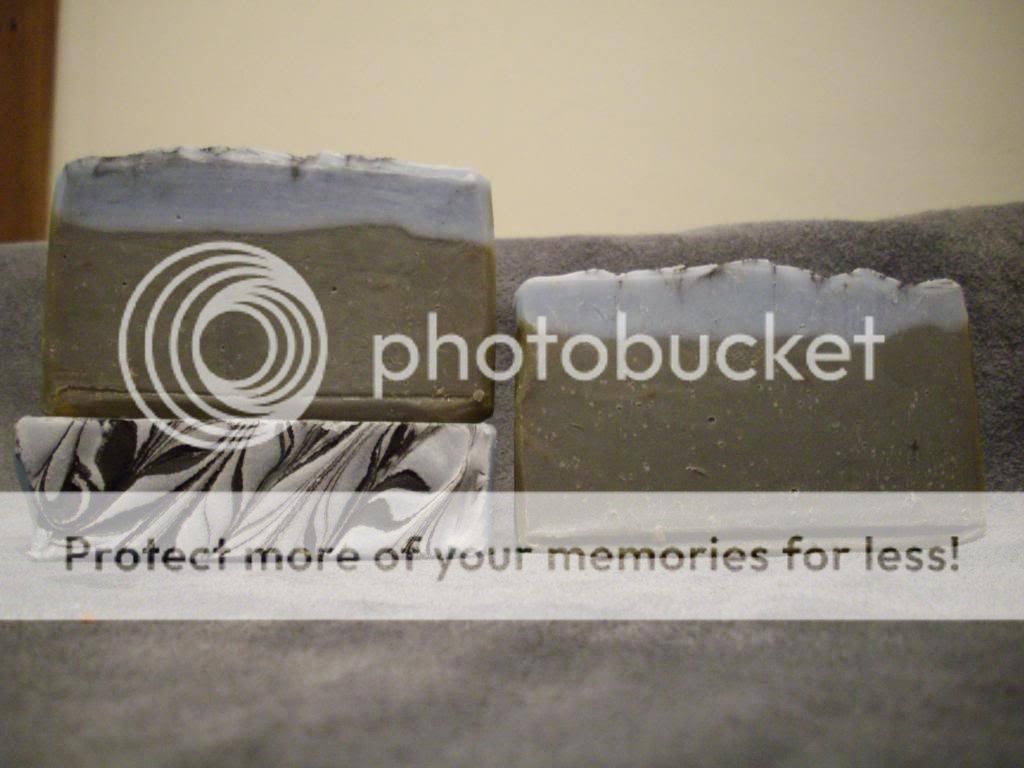
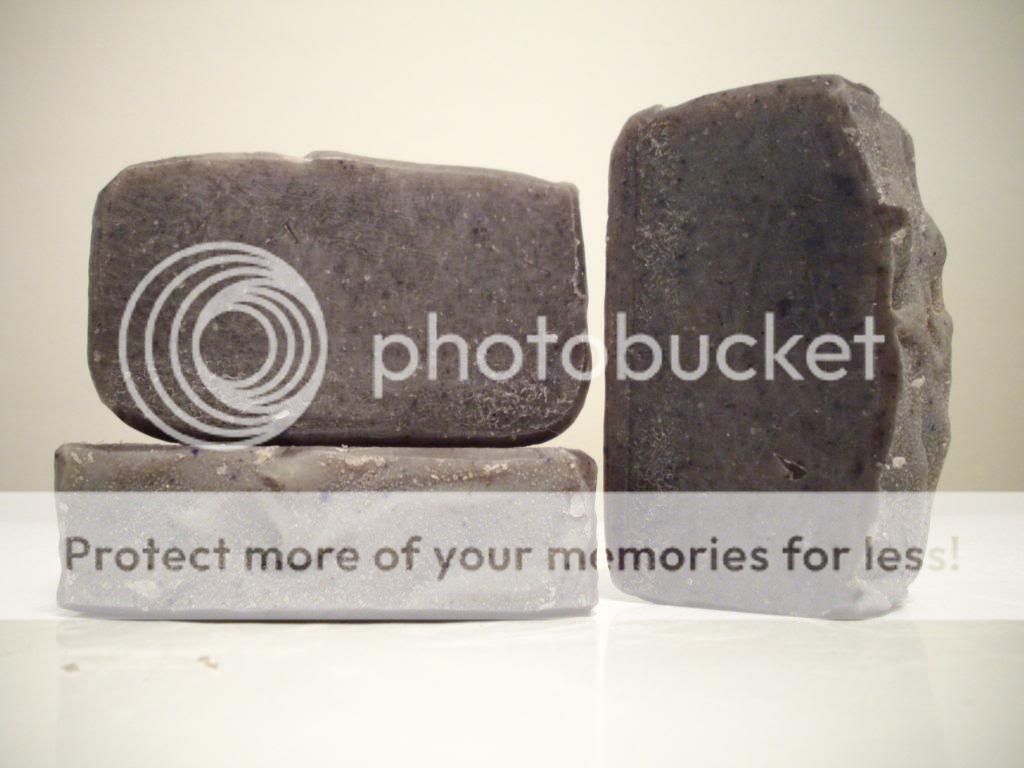
Another piece of news I got today was that I was in touch with the person that sent me the fragrance oils that I posted about previously.  She had seen my blog and said she could identify the Mystery Soap for me.  With the magic of modern technology and a really bad picture on my part, I was able to get the news that the fragrance of the Mystery Soap is Harvest Moon from The Sage.

Next in my soaping news for today is that I made my first large batch of soap.  I have been doing one pound batches, and the batch I did today was four pounds!  It may not be a lot to some of seasoned pros out there, but it was a big batch for me and, of course, it comes with the adventure story!

Well, I have been using one bowl to make my soaps in and it has been roomy, but I did realize that it was not going to be large enough to hold four pounds worth of soap.  So, I started out using a larger bowl and thought that all was well, I measured my water and then added my measured lye to it and set it out of the way.  Then I measured my hard and soft oils and put them into my nice big bowl and then came the realization that the bigger bowl would not fit into the microwave to melt the hard oils.  So, I had to pour my oils into my usual, smaller bowl and put that in my poor little microwave.

Then there was the adventure of lining my mold.  I chose to use a cardboard box as a mold rather then wait for the mold I ordered on Etsy to arrive, because I need to have this soap mailed in to Bramble Berry at the end of the month, and it needs to cure some before then.  I tried to put some plastic wrap as a liner to help avoid leaks in the box (after I used packing tape on all the bottom edges of the it).  The plastic wrap was very unwieldy, especially since I had my gloves on from handling lye and I am being frugal and did not want to have to use more then one set of latex gloves.  I quickly got frustrated with the wrap and used parchment paper on the bottom instead.  I pressed it into corners and did not do a very neat job, but, well, it is lined.

From there, I go back to actually start making the soap.  My soap is scented with Cranberry Fig fragrance oil and I would normally use enough to have a strong scent, but as I was limited in how much of the fragrance I actually had, I used enough to get a light to medium fragrance (from the current smell in the apartment you wouldn't be able to guess it was a light scent though).  I added the fragrance at a light trace and then separated two bowls and colored them red and green leaving the main portion of the soap uncolored. 

Well, in the process of mixing the colors into the soaps, the thin trace that I had in the soap became a thick trace.  I attempted to do an in the pot swirl with the colors I had.  This would involve pouring the colors at different heights so it would break through the layer of the base color soap and it could be mixed at different depths as well as through the soap.  One pouring from the highest point I could get, the soap landed on the uncolored batter and spread without breaking through.  I was a bit daunted by this, but went bravely forward and poured most of the rest of the batter in different "corners" of the bowl.  I did a swirl with my spatula and then poured it into the waiting mold.

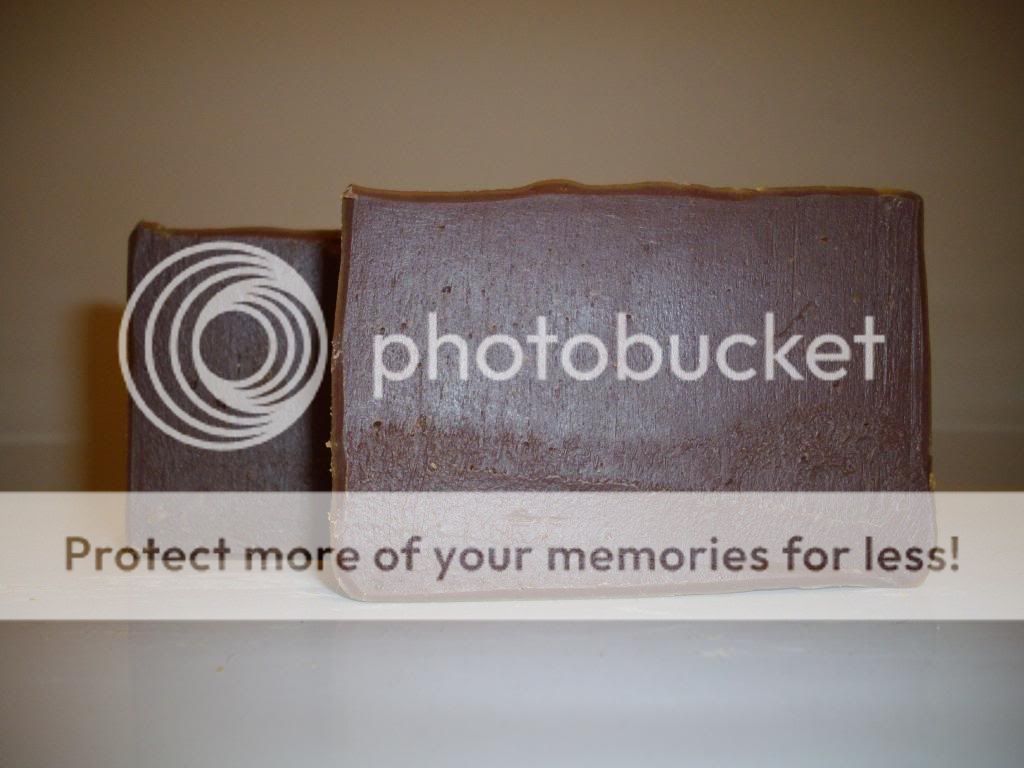
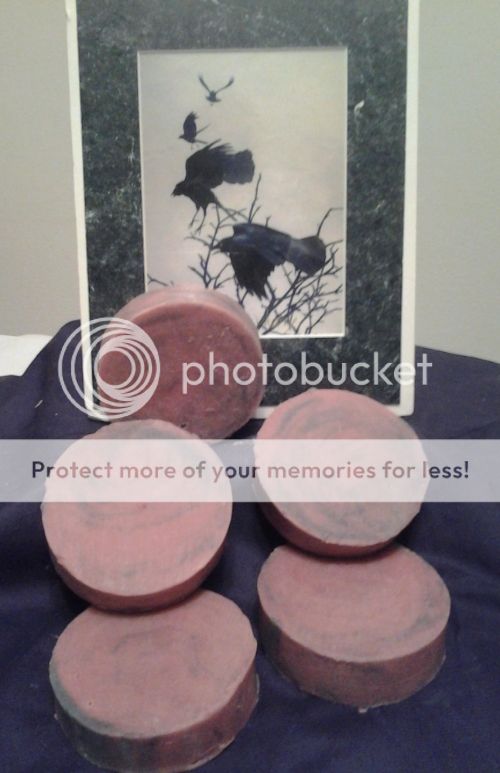
I was able to scoop bits of the color that I had remaining in the two bowls out onto the top of the soap and I created my first ever swirled top.  All things considered, it came out looking fairly nice.  I hope that I can manage to cut the soap at least halfway straight and that the inside looks okay.  I don't have any more fragrance oil or money to buy more of it, so this is kind of what I have for the swap one way or another. 


So, this is how the top of the soap looks currently as it is in the box. I have now covered it up and "put it to bed." I will see what it looks like tomorrow or Saturday!

Wednesday, April 3, 2013

Future Planning...

Well, I can't plan too far in the future because my life is hectic and next week is likely going to be busy, but I will mention a couple of plans that I have in the works for this week.  I have a package due to arrive tomorrow with my fragrance oils from Peak Candle Supplies and I have plans for a couple of the fragrances that I have ordered for there.  One of them will be something that I make sometime this weekend. 

The actual plans for what I am doing is kind of a secret as it is for the Soap Making Forum's monthly challenge and I would rather not give away what my plans are before I unveil my creation to them.  That said the theme for this month's challenge is "Locale."  I thought of a few different soaps that I could do, including some that would be inspired by various local sports teams that might be popular in the area (there are a lot of people in New England that are pretty rabid about their sports teams).  I actually picked something from the town next door to me as my inspiration and I will of course give the details on it when I post pictures.

The second soap plan for this weekend will be my first large batch of soap and unless some miracle happens and the soap mold I ordered yesterday from Etsy arrives very quickly, I will be making it using a cardboard box as a mold.  I only hope that things work out as planned and that I can cut the soap in at least somewhat straight lines after (not likely, but it is something I hope for).  This soap will be a Cranberry Fig scented soap and will be going to the Bramble Berry Soap Swap.  I plan to make this batch with an in the pot swirl using Queen Kathryn mica from TKB Trading and chromium green oxide.

I will likely try to get in a third soap over the weekend, but I am not sure what the third one will be yet.  I have some wonderful fragrances arriving tomorrow, but I have not made plans for all of them yet.  Then there is the fact that I have plans for some of them, but I do not have the colors yet to carry out my carefully laid plans.  One of these days, I might have money again, but it is not happening any time soon.

This leads me into the last thing that I have been thinking a lot about which is the fact that I would like to eventually open a business to sell my soaps.  I do not plan to have a huge business or make a lot of money or anything, but if I could make enough to pay for some of the expense of making the soap that I enjoy creating, I would be happy.  I have been trying to come up with business names that would fit for me, and have a few that I like the sound of, but I have no idea how the laws work for naming businesses and how close the names can be to other business names and such.

The main reason I am concerned about names is that there is a company called "Badger Balm" that sells balms, lip balms, and soaps amongst other things and I know that I would like to have Badger in the name of my company and am not sure if there would be a conflict there.  I do not know how far apart the names need to be in order to please the trademarking industries and everything.  If anyone has more information and would like to share, it would be appreciated.  Thanks and bye for now!

Tuesday, April 2, 2013

My Newest Creation

This is the soap that I made on Sunday evening.  It is scented with Drakkar fragrance oil from Bramble Berry.  The fragrance oil is a dupe of a men's cologne (I am not real up on my cologne scents as I don't where them very often).  The soap is colored with Red Oxide pigment and Black Mica.  The red turned out a bit more brownish then I would have liked and the black was more of a grey then black, so I could be happier with the way this turned out.

A few of the other things with it was that the colors blended together a lot more then they have done in the past when I do an in the pot swirl.  I am not sure if some of that was that the colors were too close together in shade or if some of it was using the mica and oxide together may have had a different effect on the way things worked out.  I have another plan in the works that will involve using a mica and an oxide mixed, this time with the oxide being the base color, so I will have to see how it turns out.


I am expecting my fragrance oils from Peak Candle Supplies in the next day or two, and I am excited to be receiving a bunch of new scents from them to play with!  I have a soap for a soap swap through Bramble Berry to make, as well as this month's challenge soap from the forum.  This month's theme is "Locale" and I already have my soap planned for it.  There are some other challenges going on through another blog, and I may also be trying some of those as well. So, it seems that I will be pretty busy for a while!

Soap Mold Failure

So, as planned,  I went out yesterday and bought some wood and nails attempt to put together a couple soap molds.  I bought a furring strip as was suggested by someone on the Soap Making Forum and had a minor problem when I bought it.  I had wanted some 3" segments for the ends and was informed that they couldn't cut them that small because the saw would just eat the pieces.  Not being daunted by the first kink in my plans, I asked to have the segments that were to be 3" each into 6" and I would cut them in half at home.

So, today, I duly worked at cutting one of the 6" segments into two 3" segments (with my Swiss army knife saw as that was what my partner and I had).  It was only an inch thick and 4 inches wide, so this was not too terrible... well, not as terrible as it could have been.  I decided it was okay if the lines weren't anything resembling straight on the outside edge.

Then, I attempted to nail the pieces of wood together and that is where things started to really go wrong.  The wood was very hard and I am a failure when it comes to using a hammer it seems.  I managed to get the nail into the wood about half an inch and then my partner had to take over.  He managed to get about three quarters of the way finished on the mold (with the caveat that it was a bit lop-sided but I could deal with that...)  Then we got to the last end piece we had to attach and the wood on the side piece split on us... So, long story short, it was a complete failure at becoming a mold. 

We do have another set that we can attempt to make into a mold, but with the wood being so hard and the tendency towards cracking, I am not sure if it is worth attempting at this point :-(

I also put myself into a soap swap on Bramble Berry with the though that I would have the mold to make some soap in.  I do still have the PVC molds and I am also looking at cardboard boxes as an option.  Cardboard boxes are cheap and make nice molds from all I have heard, I just have to figure out the dimensions and how many pounds of oil to make the batch for the box I am thinking of using.  I am also thinking that I am going to have to split it up into two batches unless I use the PVC molds.

Sunday, March 31, 2013

Sage and Cedarwood

On Thursday I mentioned working on a soap in differing shades of green using what is known as the faux funnel method.  After a very busy weekend and trying to play catch up with other things going on, and making another batch of soap today.  I am ready to post the picture of my new soap.

It is scented with Sage and Cedarwood fragrance oil and I used Woodland Green Oxide for the coloring (both scent and color were from Wholesale Suppliers Plus (and, no, I don't work for them or anything, I just like the fact that they have incorporated shipping into the cost of their items, so if you order over $30 worth of supplies, you get free shipping and overall it cuts down on my prices).


The method that I used was fairly easy to do.  The biggest difficulty was that it had to be done fairly quickly because the soap starts to get harder to pour as it becomes thicker.  It involved stirring a fair amount between pours near the end and a little bit of persuasion to get the soap through the funnel.  Overall I had a fun experience, and I was very pleased with the result.  I especially like the way the rings are somewhat reminiscent of the rings on a tree and how that ties back to the scent of the soap.

I have another batch coming up that I made today and I will likely post it late tomorrow night or sometime on Tuesday.  I also am debating whether or not I can afford some more supplies and whether or not I have the skill to make a simple log mold out of a furring strip from Home Depot.  If I can get the costs that are listed online in the store and have them cut the wood for me, I can likely get my mold for under $5.

The Haul

So, I got a surprise yesterday morning when my package from FedEx arrived early.  It had originally been due on Monday, so I was very happy to receive my fragrance oils and some sample soaps from my friend on the Soap Making Forum.  I was elated as I opened the box and saw all my new bottles of oils wrapped safely within.  As I took each one out of the box, I felt like a child on Christmas morning. 


Not all the bottles are full, but I am so happy with my new oils and I am not sure what to do with them all!  I have ideas for some of them, but I keep thinking of things that I need different colors then what I have for.  Argh!  This may end up with me putting in another order at Wholesale Supplies Plus.  I am getting my collection of things up much faster then I expected though.  I am sure I can go through these supplies just as fast though!

Anyways,  as for the various fragrance oils (and a couple essential oils also) that I was given, there are scents such as Dragon's Blood, Magic Dragon, Mother Earth, Gardenia, Vanilla Black Currant, River Dance, Amber Romance, Meyer Lemon, Oatmeal, Milk & Honey, Bergamot Mint Essential Oil, Clary Sage Essential Oil, Pumpkin Pie, Bramble Berry's Drakkar dupe, Bay Rum, Crisp Apple Rose, and Sun & Sand (and more that I forget).  Not all of the bottles are full, but some of them are and many have enough for at least one pound of soap.

Along with the oils, I was sent several sample bars with other various scents, so I could see what they smelled like.  These include Black Raspberry Vanilla, Lavender & Mint, Fresh Lemongrass, Love Spell, Sandalwood Vanilla, and a mystery bar (the label with the scent appears to be missing).  They all look lovely and I especially enjoy the scents of the Lavender & Mint, Vanilla Sandalwood, and the mystery scent.

Of the oils, I think that the Pumpkin Pie and Bay Rum are my favorites.  I really like the Crisp Apple Rose, River Dance smells nice in the bottle, and I also like the Drakkar and Bargamot Mint.  I have some plans for some of the scents and some may depend on what this months soap challenge ends up being.  I thank Marjorie again for her kindness in spreading joy to others.

Thursday, March 28, 2013

Some Soapy Cheer

Another day and another day of soaping.  I got my delivery of oils yesterday from Wholesale Supplies Plus so I could actually make soap today. I used my normal recipe, but tried a different coloring technique and I think I will go crazy waiting until I can unmold it and see how it came out!  Along with my base oils, I got a fragrance oil of Sage and Cedarwood.  So, today's soap is scented with the new fragrance and I separated the soap batter into three.  One of the batters I left uncolored, while the other two I used green oxide on and made two different shades of green.

Using a funnel, I poured a small amount of each color into my PVC mold.  I first poured the uncolored, then the light green, then the darker green.  I repeated this process over and over again until I had used all the soap.  I had seen this method before on a youtube video, but it the first time that I have tried it.  Tomorrow, after a long day of waiting, I will be able to see how my soap turned out.  Sadly, I likely won't be able to post pictures here until Saturday as I will not be home until late Friday night (technically Saturday morning) because I am visiting some friends.

There are a couple of other things that I would like to bring up in my soaping experiences recently as well.  One of my friends from the Soap Making Forum decided to clear out some of her fragrance oils and she is generously sending the oils that she does not want to me.  So, I am expecting a package from FedEx with this kind gift.  It will be like Christmas to me!

The other thing I wanted to bring up is from another member of the forum offered me a gift certificate for Peak's Candle Supplies.  They are currently having a sale on fragrance oils that are usable in soaps.  I was honored and amazed that I was picked out for this.  I cannot find the words to express how happy I am that I found the forum and the kind people there.

Tuesday, March 26, 2013

Soaping So Far

Well, I started making cold process soaps less then a month ago. Since my first batch, which turned out to be lye heavy (most likely caused by a scale failure.. that sometimes happens when you spill oil on a relatively cheap digital scale). That first soap has been grated down and it being used for laundry soap. If you would like to see what I lye heavy soap looks like when you try to cut it, this is one example:
 
My second and third attempts were much more successful and are currently curing. The colors did not come out quite as well as I would have liked, but I am happy to have usable soap instead of laundry soap again :) The soap was made as a challenge from the Soap Making Forum to make a soap that represented something from mythology. My soap was based on the Morrigan. The red came out more as a pink and I did not scent the second attempt as I thought that might have been part of the problem with the color sticking.
 By my fourth soap, I feel I was getting more comfortable with my recipe (a mix of olive, palm, coconut, and castor oils), and my soap came out looking very nice (at least to me). It was scented with an Indian Sandalwood fragrance oil from Bramble Berry and the swirl was done with red oxide. I feel I also started improving some on presenting my soap better with my photography. I am slowly learning these things :-)
 In my fifth soap, I decided to get a little more daring, and I made a green tea infusion to mix with my lye instead of water. This consisted of three tea bags steeping in 172 grams of distilled water. I gave it plenty of time to cool off before adding my lye to the tea as the lye already gets to approximately 200 degrees without the added heat of tea that was not at room temperature (soap making is trying to teach me patience). After mixing the lye and tea, I made the rest of the recipe as I normally would.

When I added the lye mix to the oils, I was a bit concerned as a lot of brown suck to the bottom of the oils. I stuck it out and began stick blending anyways, and my usually tan batter turned a dark and ugly brown! I had a green oxide already mixed that I had been planning to add to the soap, so even though the soap was already an ugly dark brown that seemed like it would barely pick up the green color, I added the colorant into the mix and then added the lemongrass fragrance oil that I almost forgot!

By this time the soap batter was thickening and as I poured it into the pvc mold, it was a very dark green brown, almost like a melted chocolate with a touch of green in it (I am keeping away from some of the more disgusting things I could use to describe it as, but it was really ugly). I feared the worst for the appearance of the soap, but it smelled wonderful! After a few hours of saponifying (I also had wrapped the soap in hopes that it would gel and this would help the soaps ugly color), I took a peak at my soap and saw that it had turned a lovely shade of green.

I went to bed happy with my success. Things were not all roses with this soap after this though, because I decided the next day that instead of giving it the full 24 hours to saponify, that taking it out of the mold an hour early wouldn't hurt anything. I was wrong.

My soap got kind of stuck in the mold and this was another one of those times when I had to practice patience as I tried alternately freezing and heating the soap to get it to slide out of the pvc mold. After a few hours of trying every hour or so, I let it sit on the counter for about two hours and then with a surly look, I tried again. I was about to give up for another few hours when it moved! So, with a bit more persistence, I managed to get my green tea and lemongrass tea out of the mold, none the worse for the wear.
 
This leaves me with my latest creation. This was a Shea butter soap, which changed up my recipe a little bit. I used my normal one pound batch and added 10 grams of Lavender essential oil and 15 grams of Indian Sandalwood Fragrance Oil. So far the bar feels very nice and looks pretty (no coloring added), but the scent is mostly lavender. I will see how it settles out as it cures and then in use.
 

So, that is the story so far, will be adding more as I make them. Oils are due in tomorrow!!